
Using Masking Fluid in Watercolor: Control, Planning, and Release
Watercolor’s luminosity depends on the white of the paper. Because the medium is transparent, light is preserved rather than added, making advance planning an essential part of the process. Masking fluid is one of the tools that supports this kind of intentional decision-making, allowing areas of light to be protected while still maintaining flexibility as the painting develops. It is a tool that has a learning curve, but when implemented appropriately, it continually proves to be invaluable to my art practice.
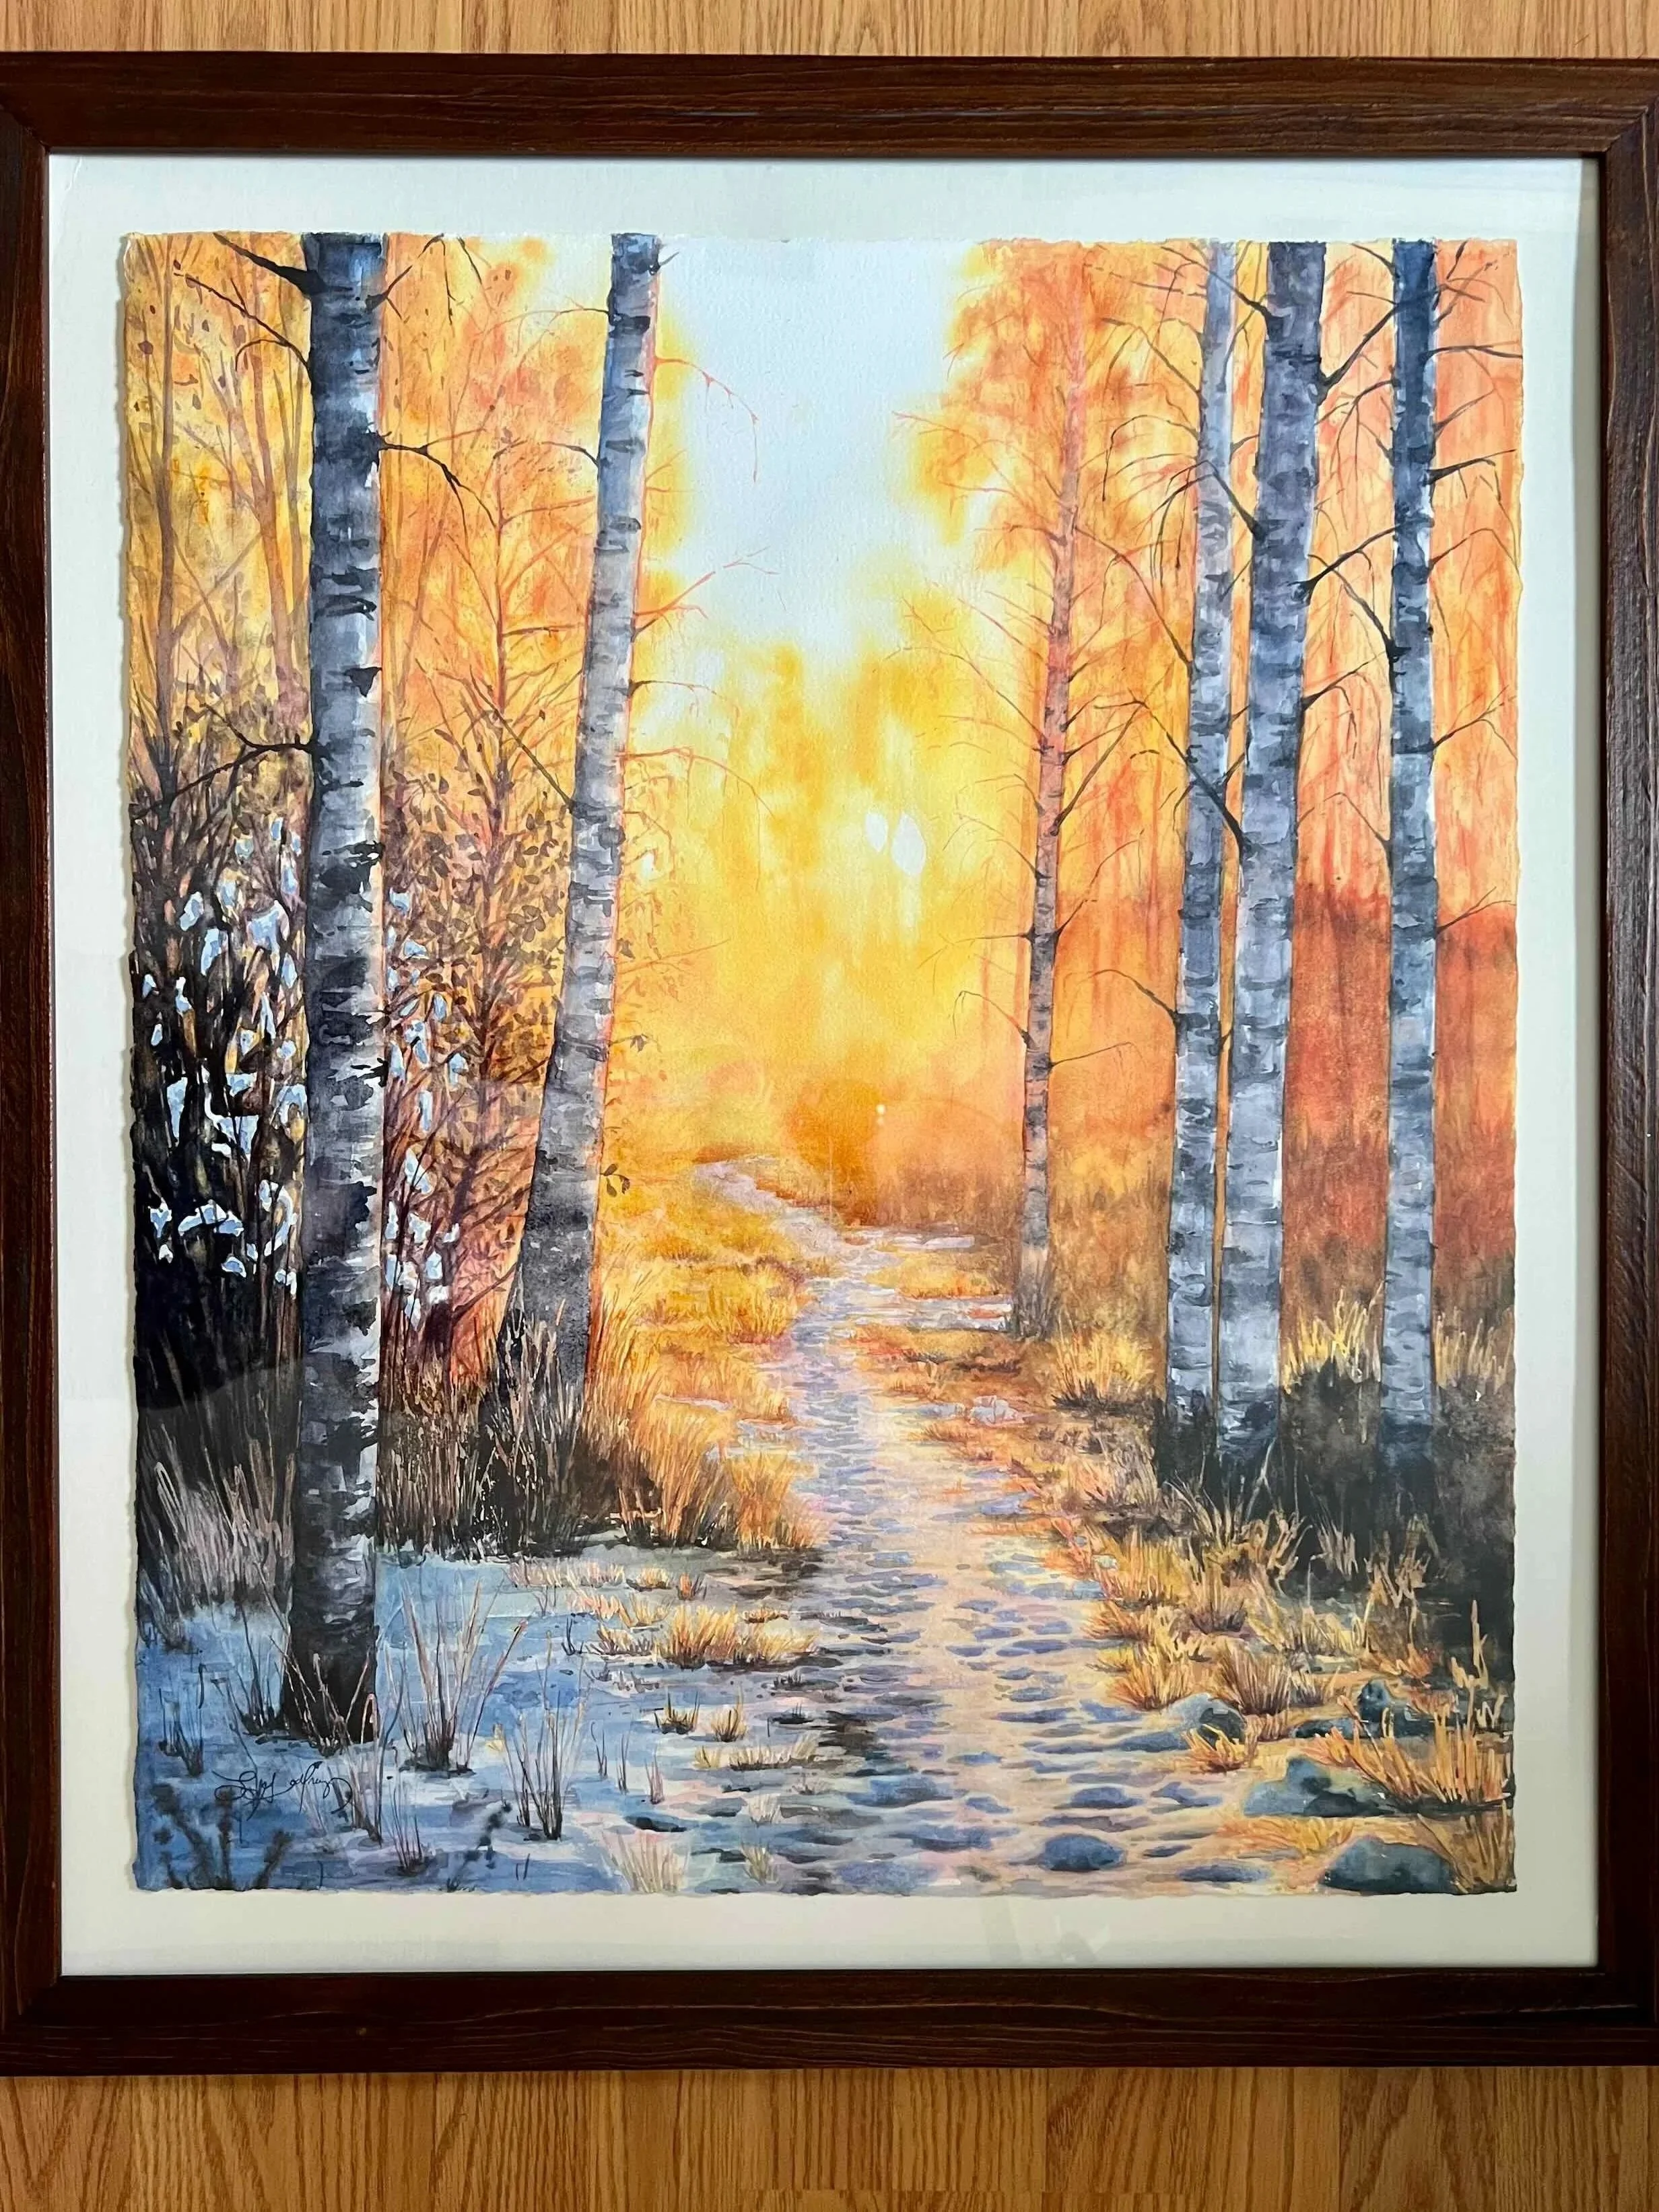
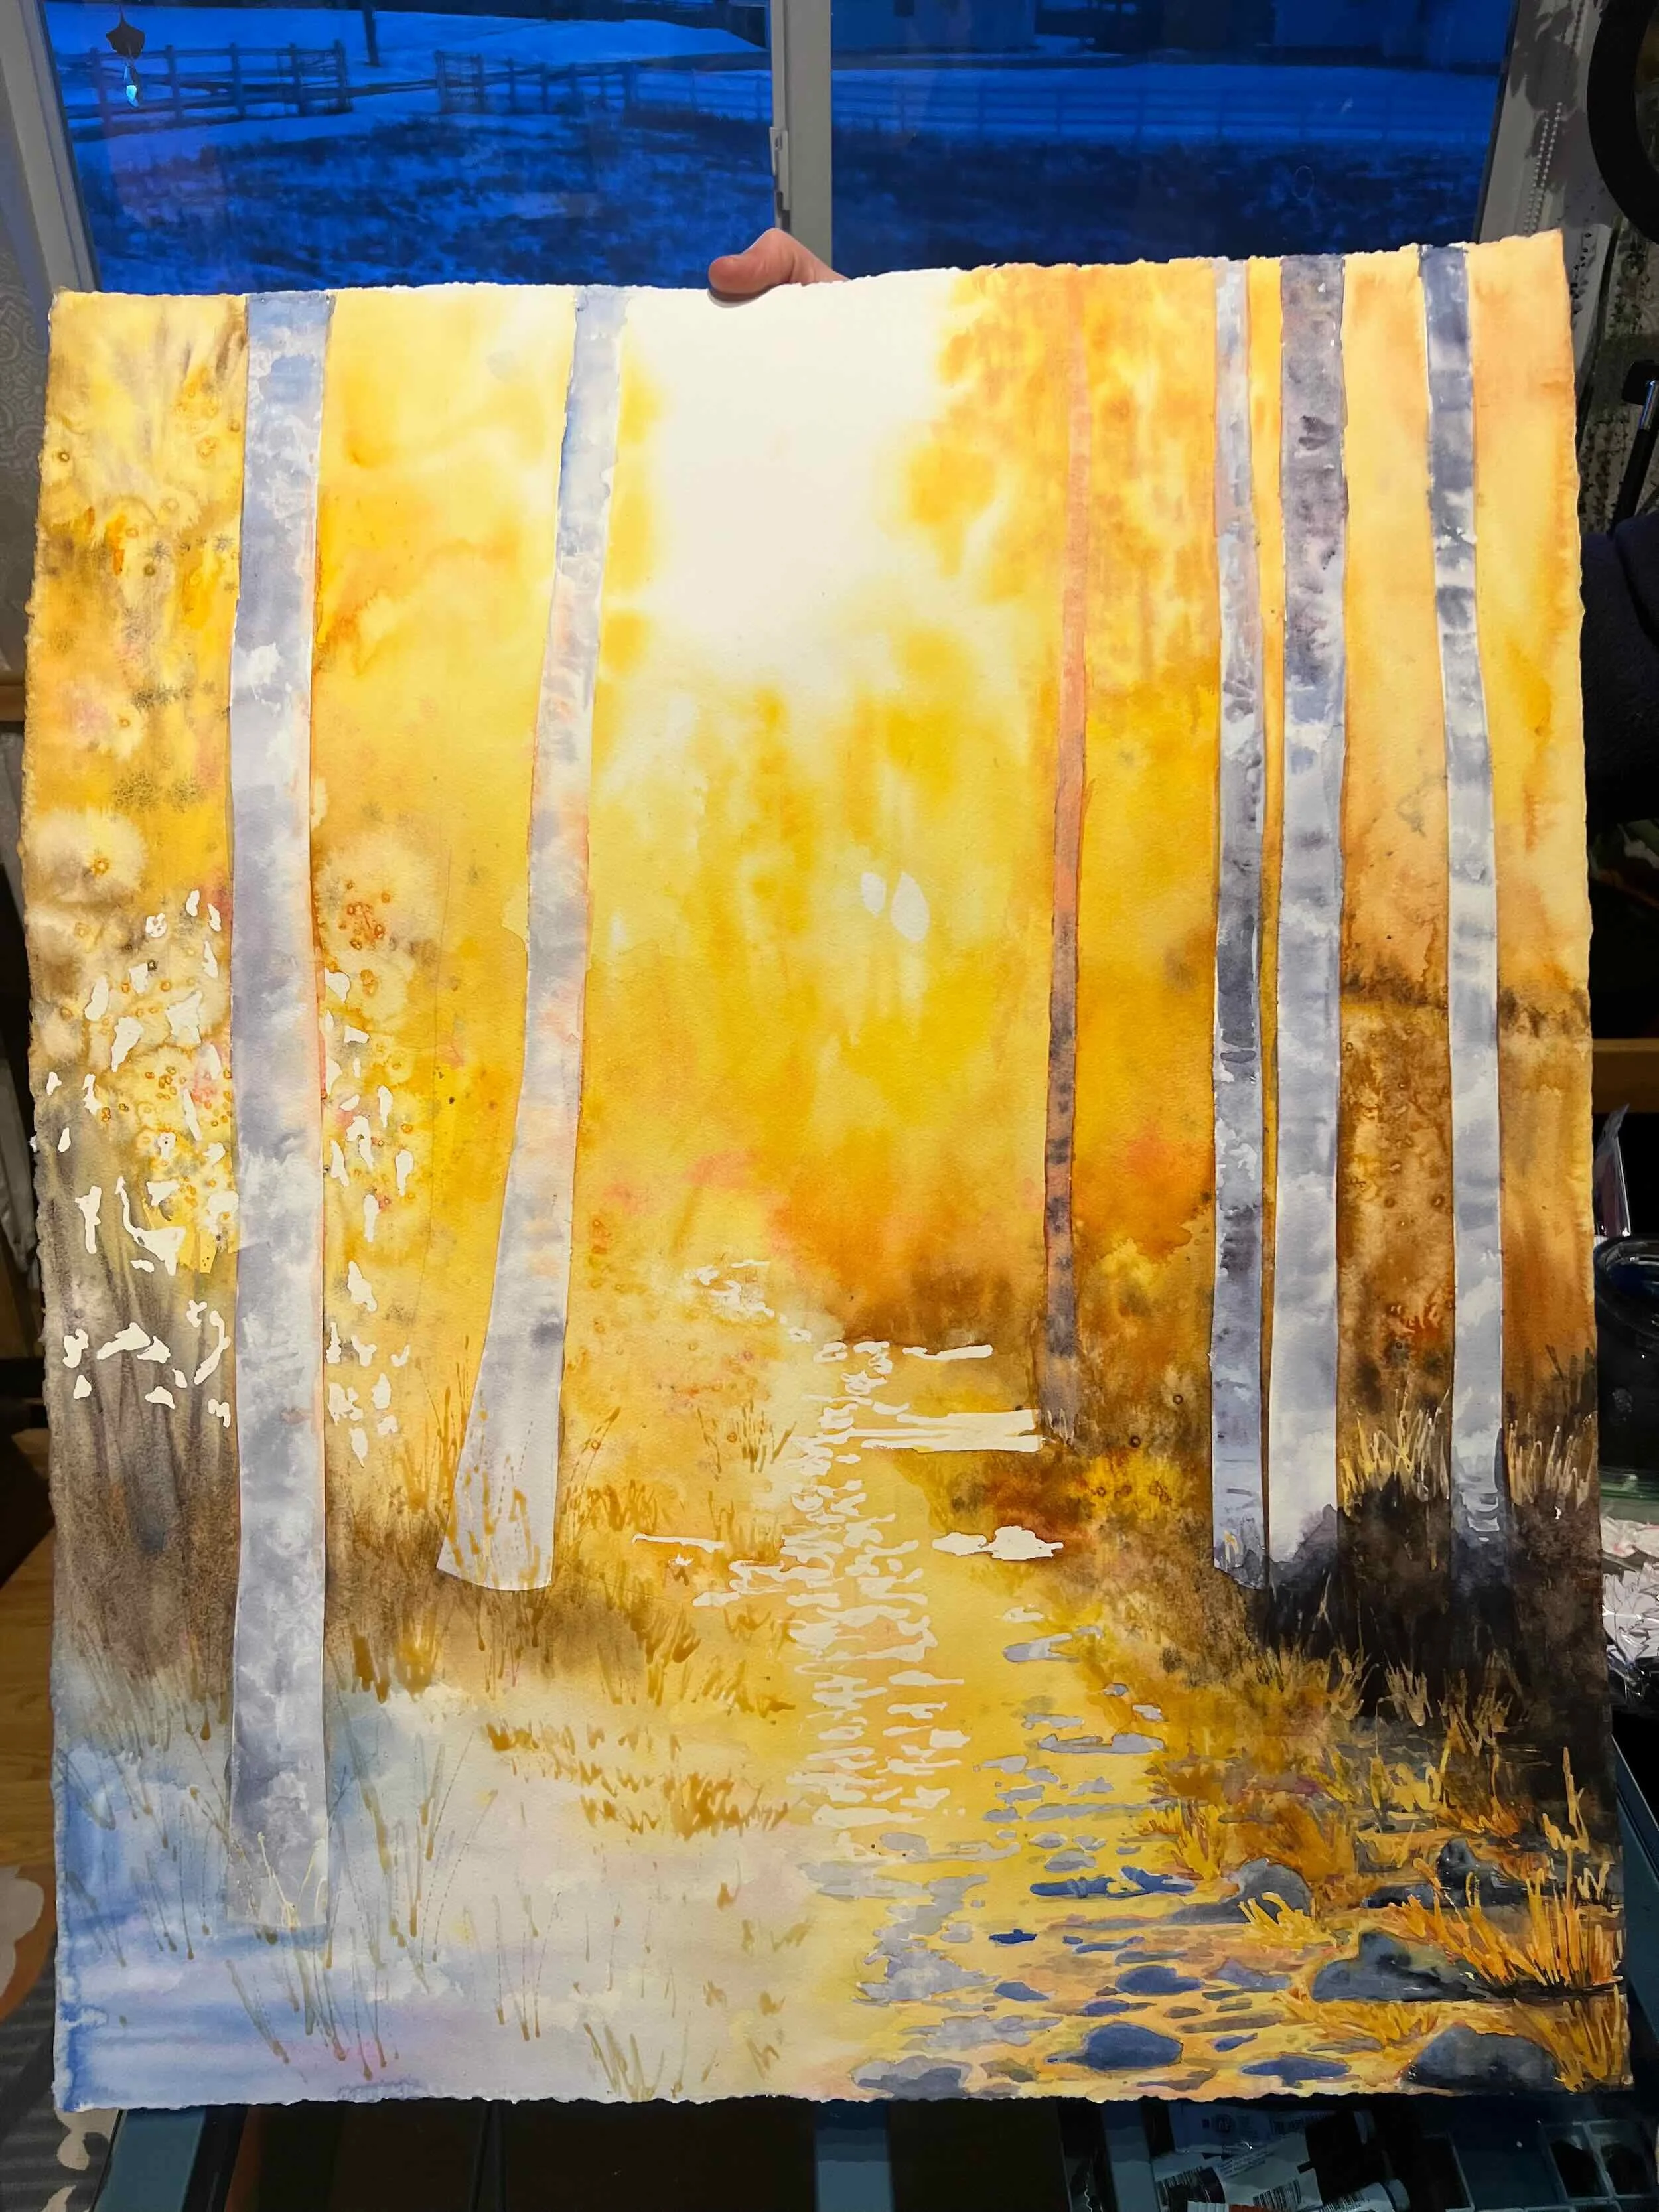
A watercolor painting by Lindsay Godfrey
Choosing Between Masking Tape and Masking Fluid
There are several ways to preserve lighter shapes, but the methods I rely on most are masking tape and masking fluid. I tend to use masking tape for larger shapes or areas that require clean, precise edges. Masking fluid, on the other hand, is best suited for irregular or intricate shapes where a more organic edge is needed.
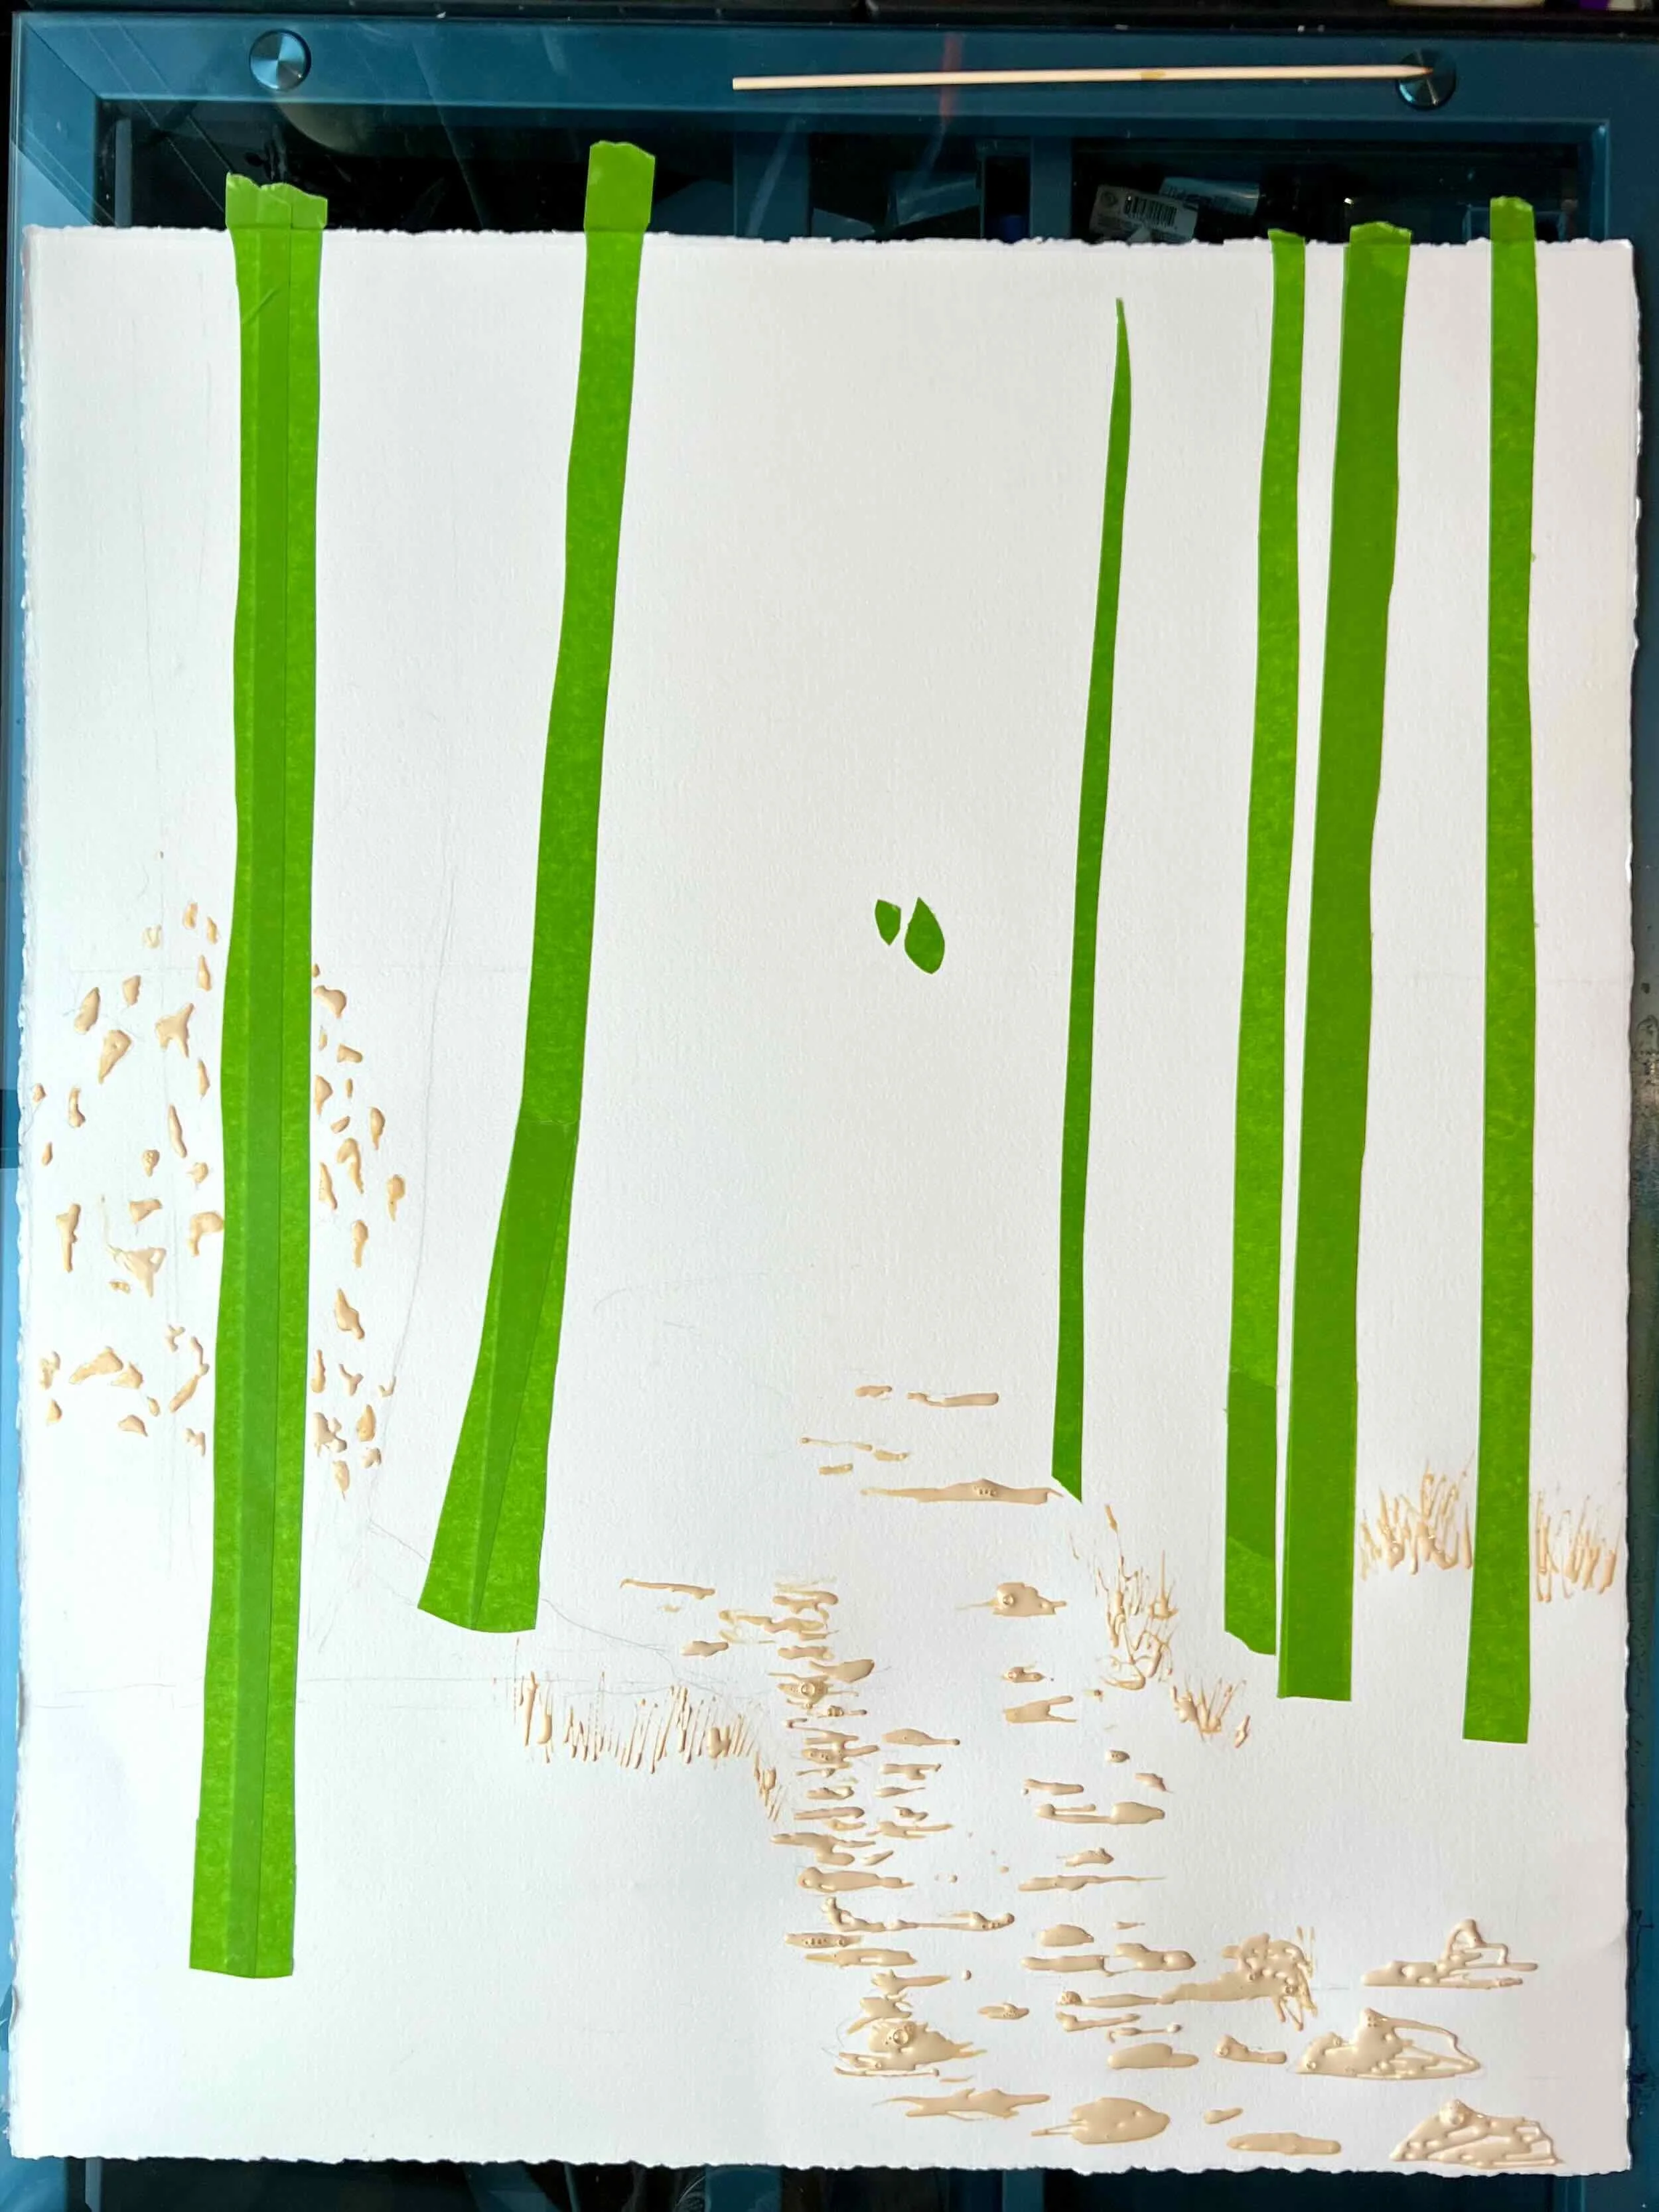
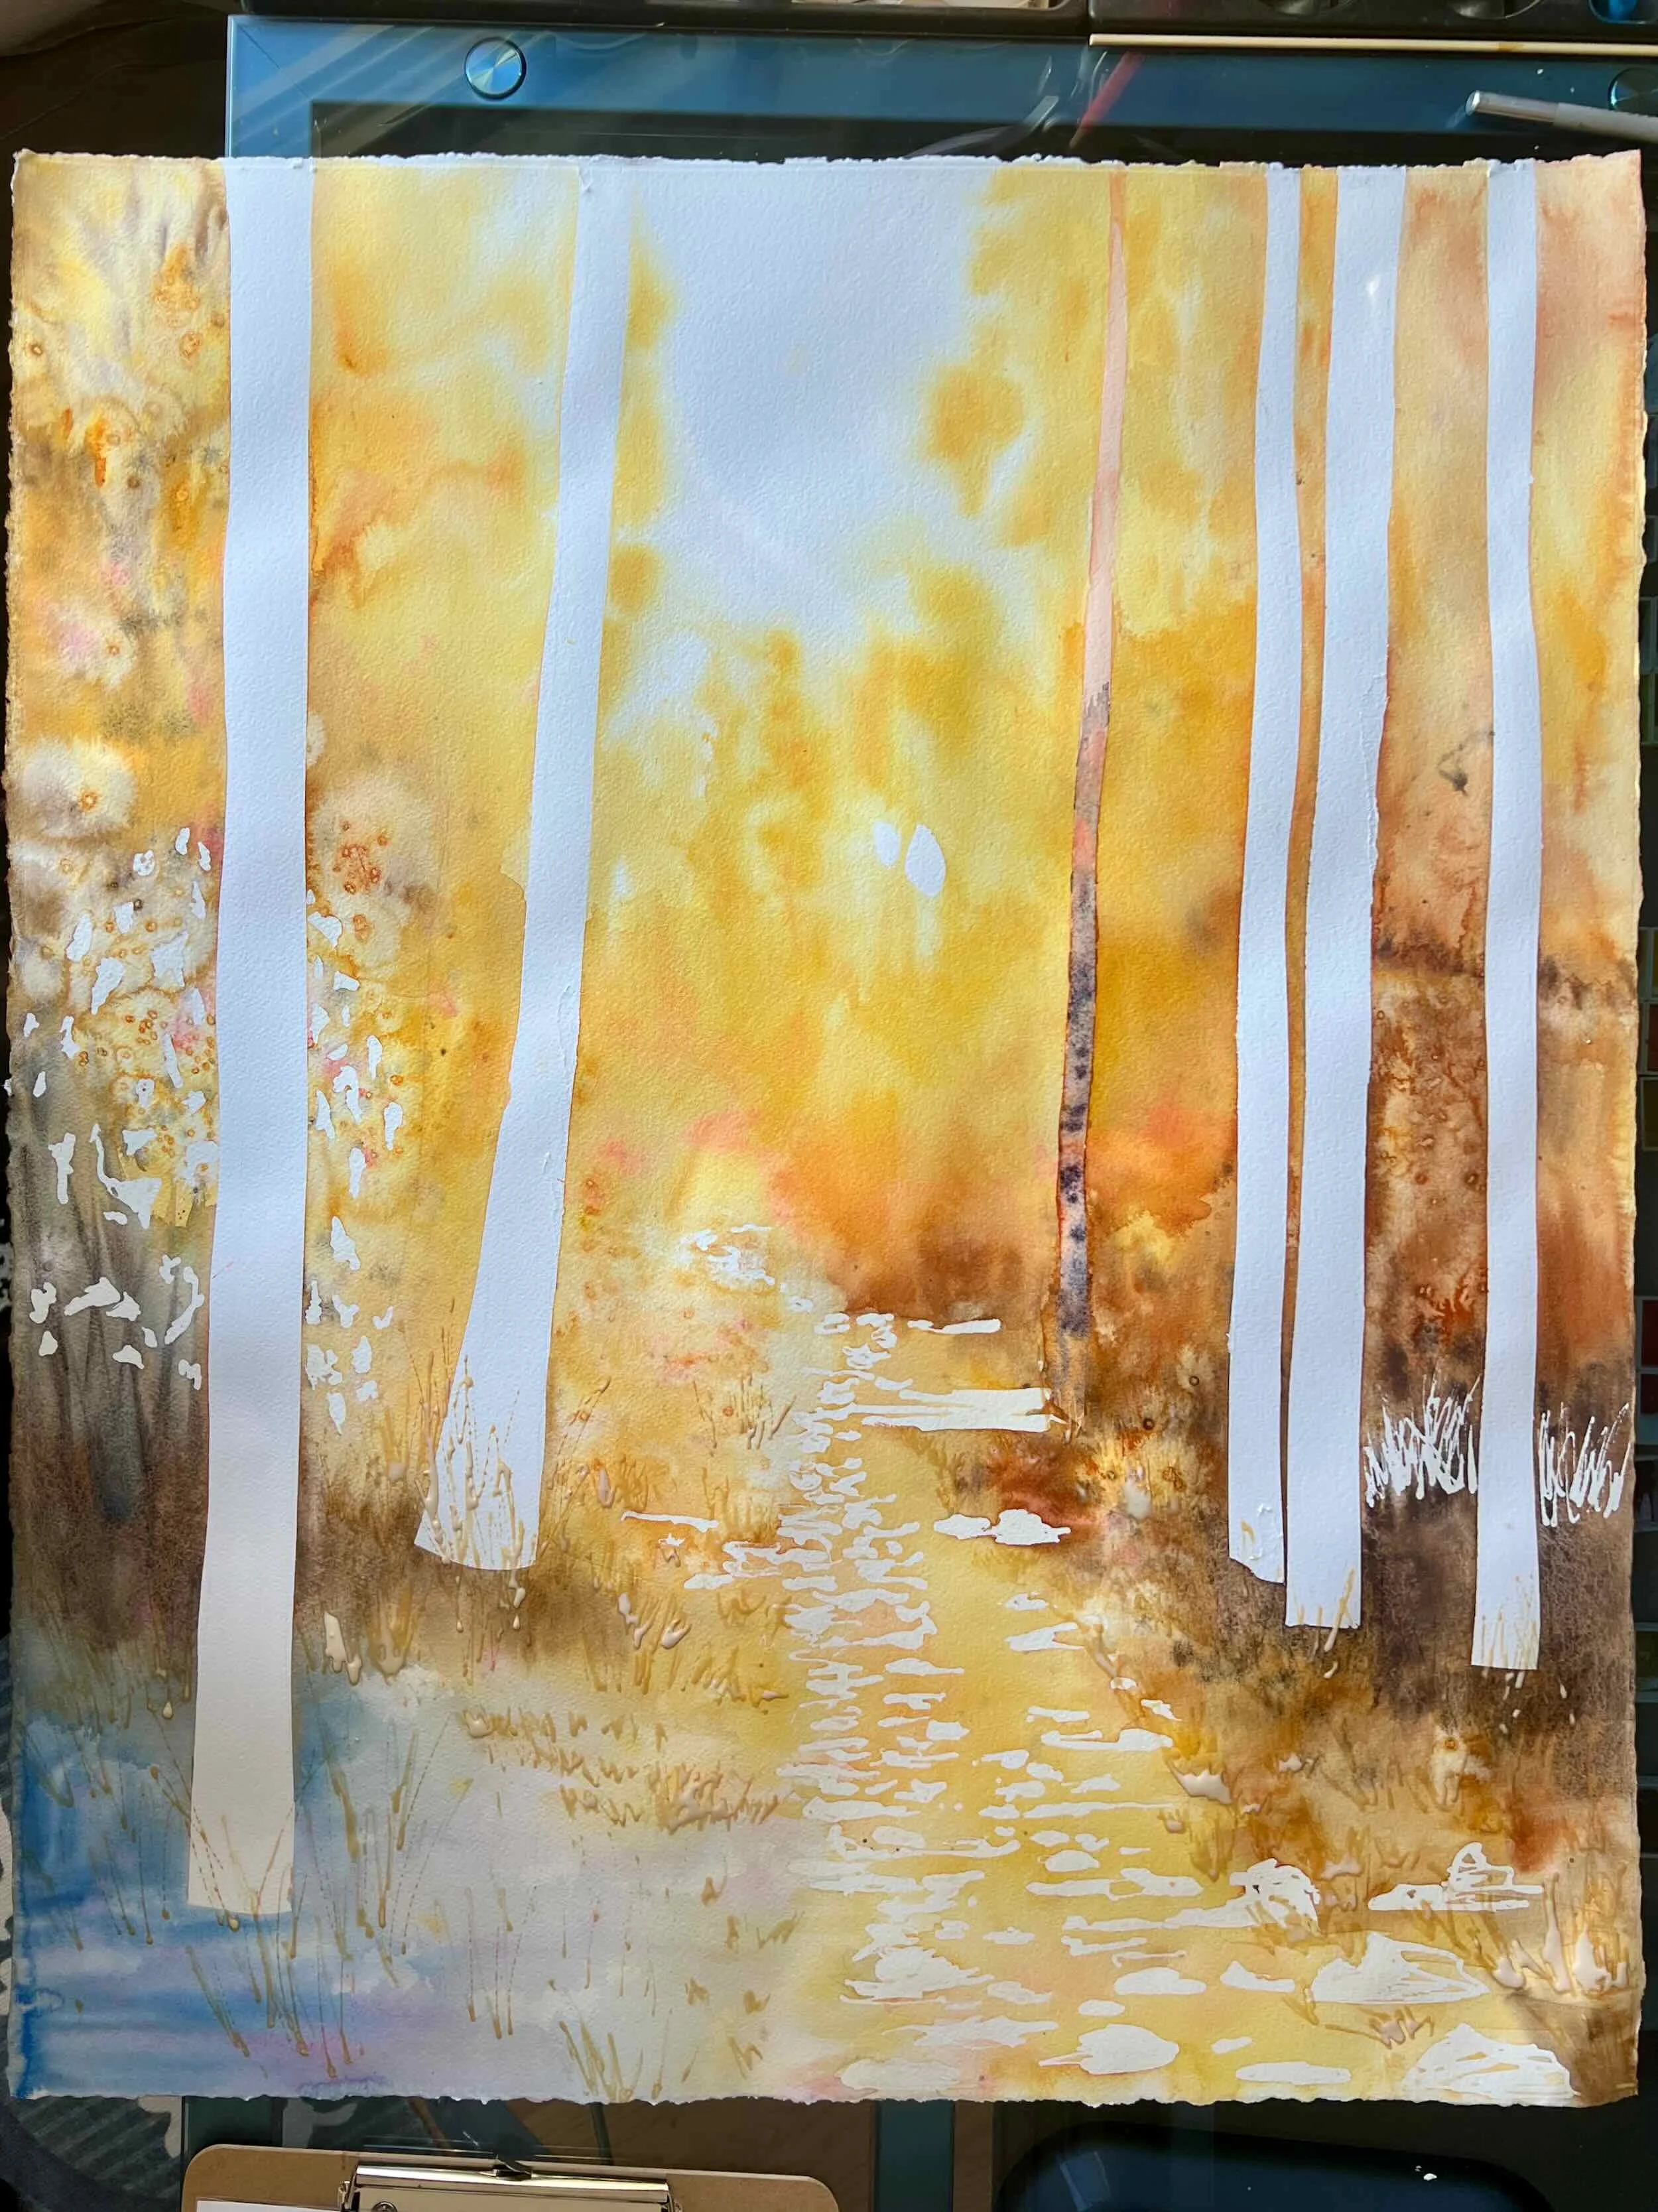
A masked artpiece before adding pigment.
What Masking Fluid Does
Masking fluid is a liquid latex product applied over areas you wish to preserve. It can be applied directly to white paper or over a very dry and lightly painted shape. Once dry, it creates a barrier that resists subsequent washes.
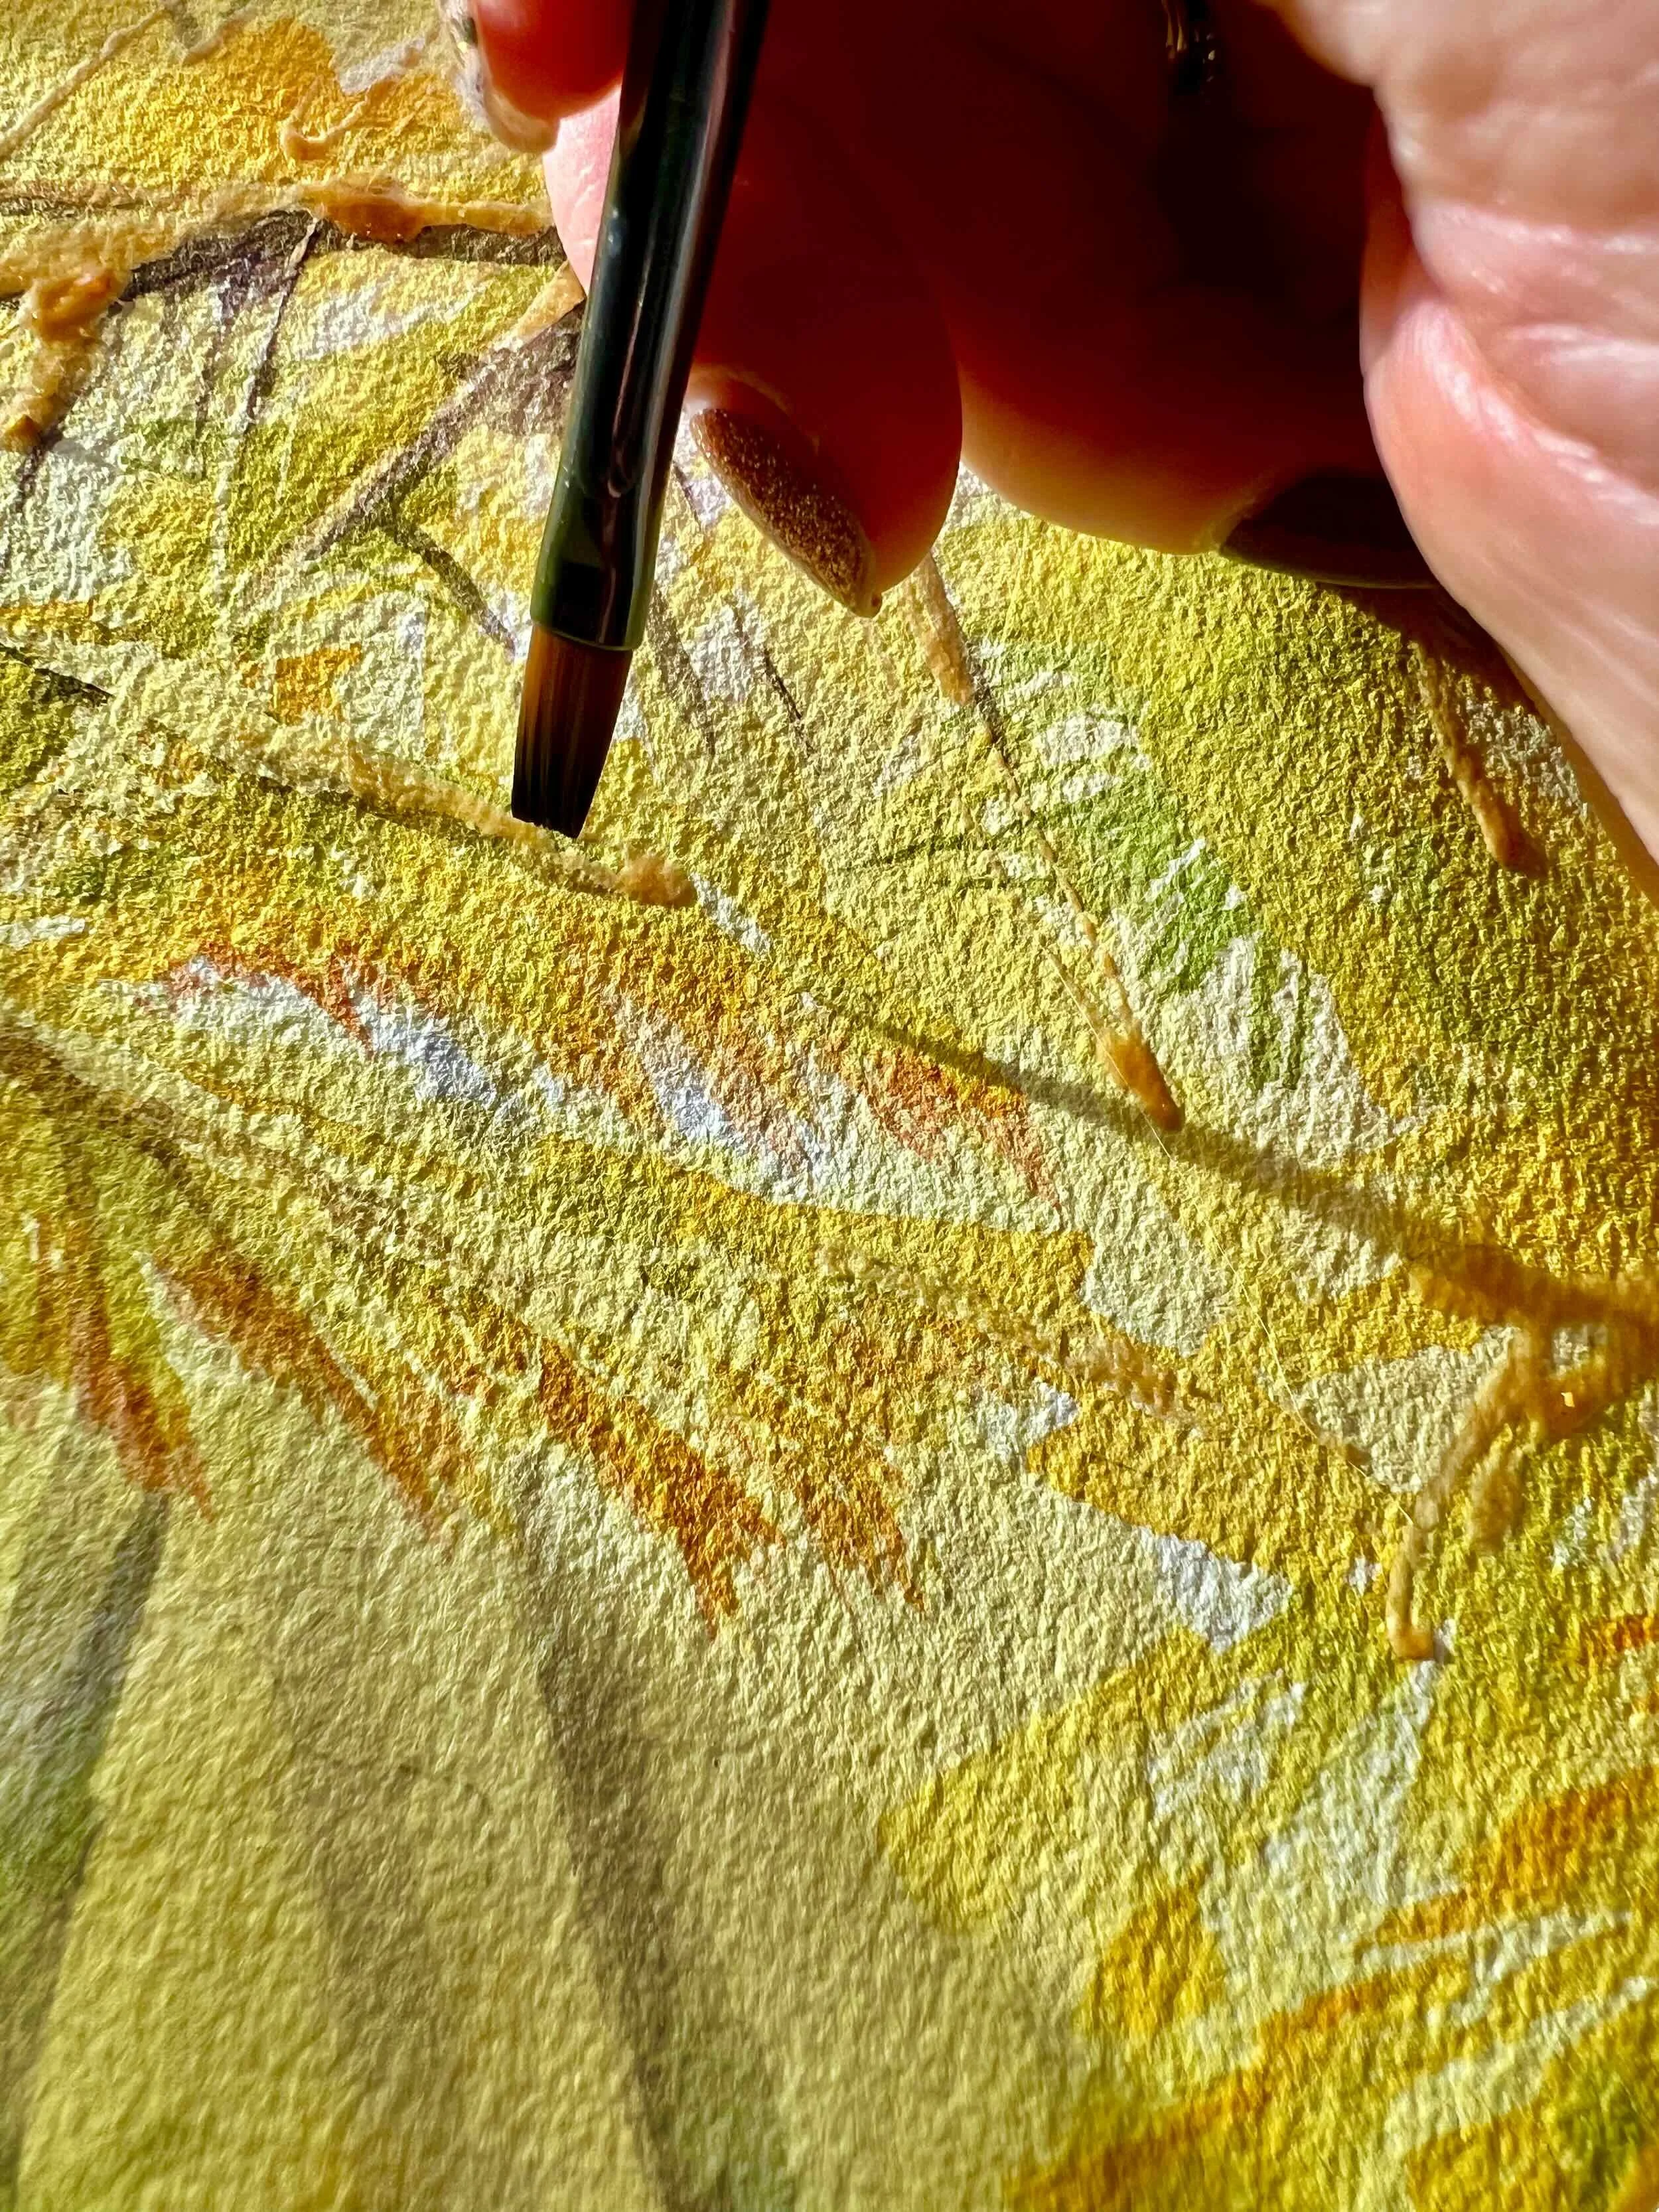
Applying Masking Fluid
Because masking fluid can permanently damage good brushes, I always apply it with an old brush. To protect the bristles, I first wet the brush and roll it over a clean bar of soap, coating the bristles thoroughly. This creates a barrier that prevents the masking fluid from drying inside the brush. I repeat the water and soap process every few minutes while working, continuing until the application is complete.
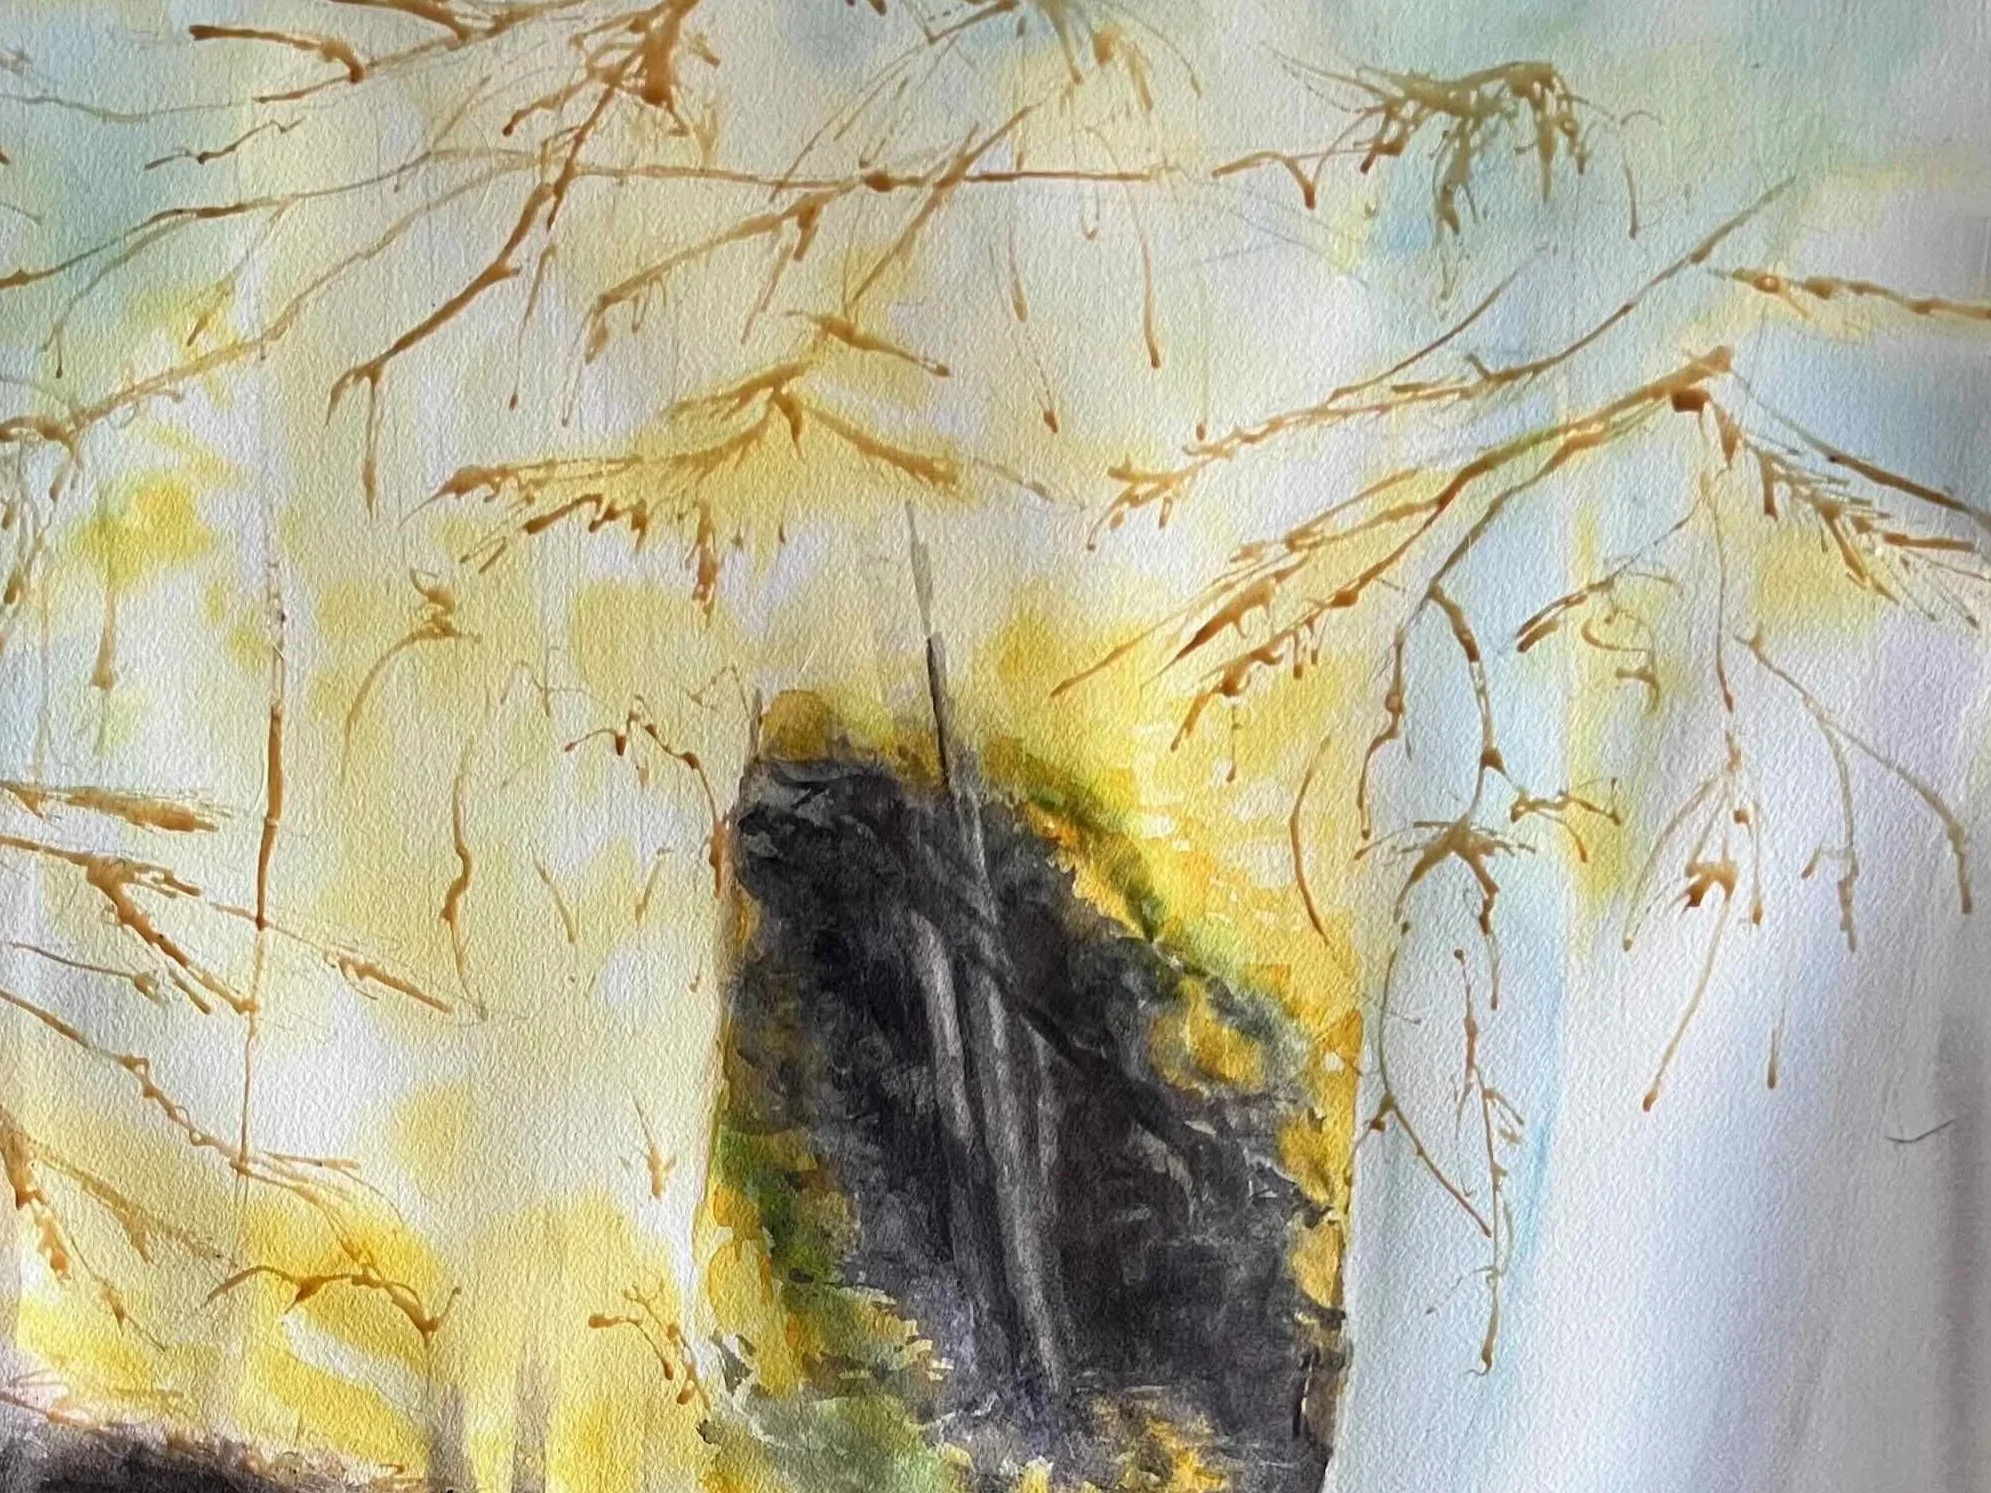
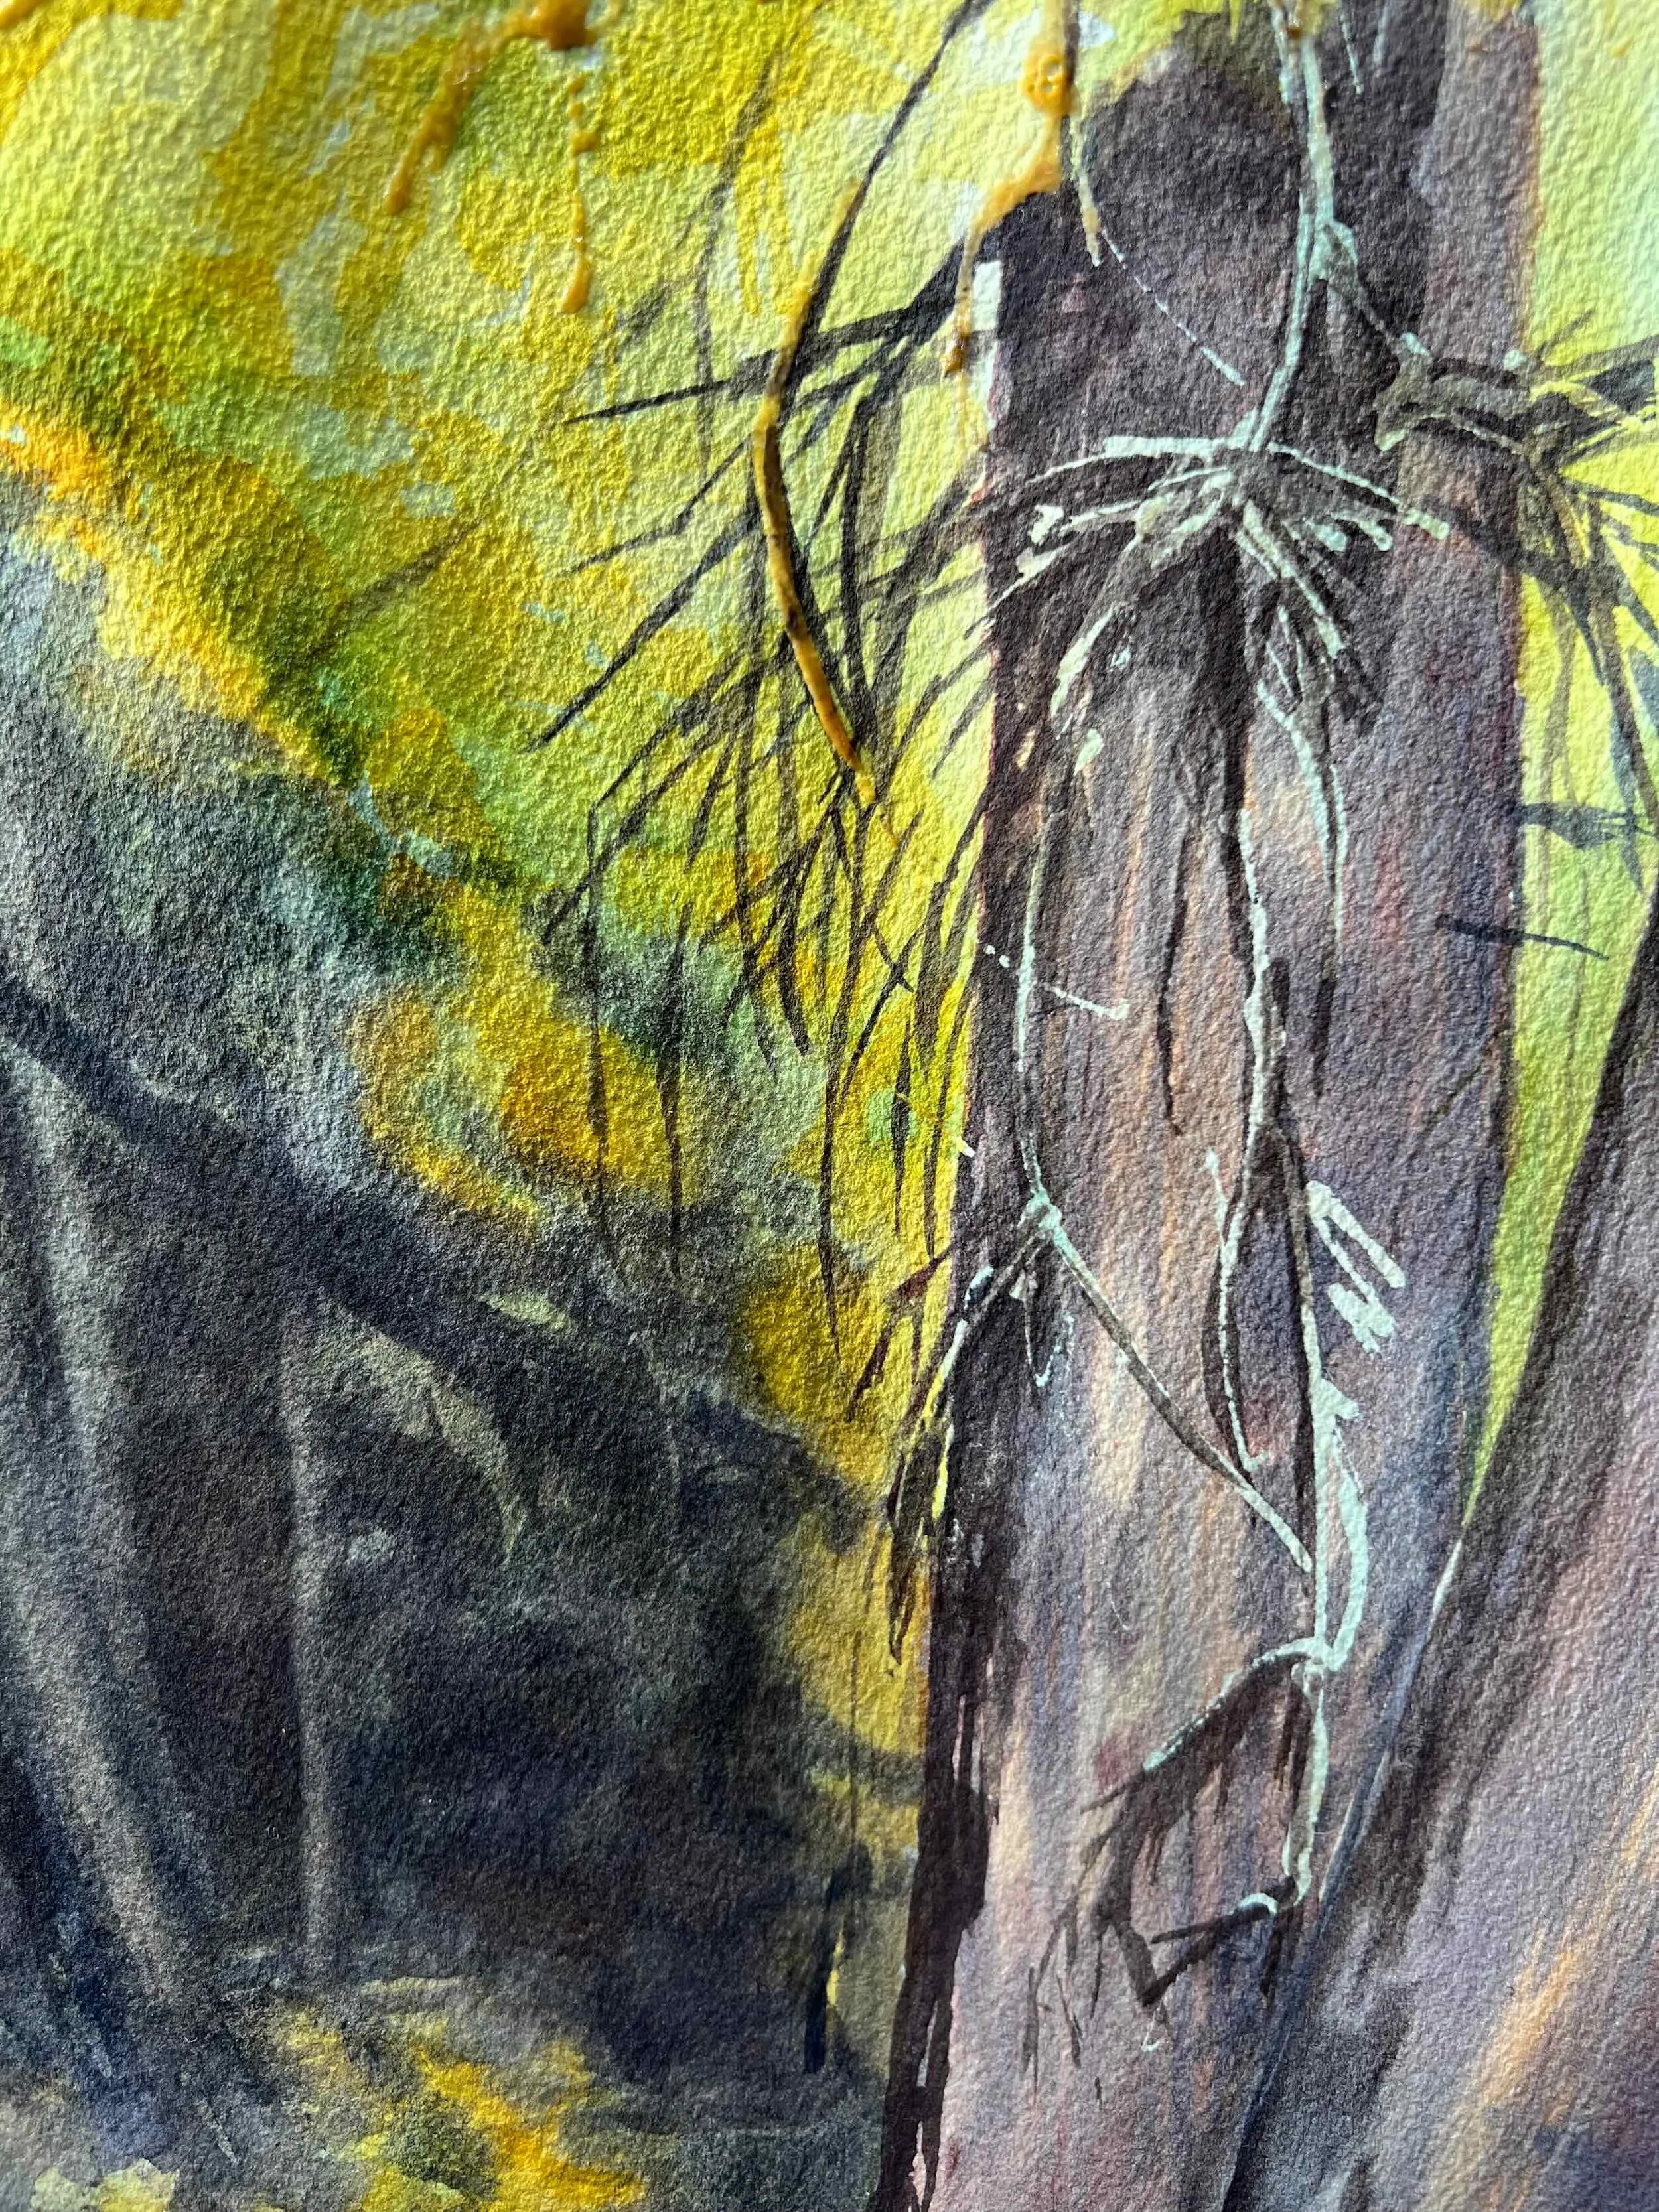
Dry masking fluid after an initial wash.
Timing Matters
Before applying any additional layers of pigment, the masking fluid must be completely dry. Likewise, once your painted layers are complete, they must be fully dry before removing the masking. Removing frisket too soon can tear the paper, leaving uneven edges or even holes.
Removing the Masking
To remove the dried masking fluid, I often use a pickup eraser, a rubbery rectangular disk designed to lift material from the surface of the paper. It allows the masking to be gently pulled away without damaging the paper beneath. This step can be slow and somewhat tedious, but it is also one of the most satisfying moments in the process as the white of the paper is revealed. Working in small sections and cleaning the eraser as it becomes gunky helps keep the process controlled.

Integrating Preserved Areas
Once the masked areas are revealed, they rarely remain untouched. I often soften hard edges, introduce subtle color, or adjust values to better integrate these preserved shapes into the painting. Masking fluid is not a shortcut, but a planning tool that supports watercolor’s natural transparency and light.
An Invitation to Explore
Masking fluid, when used thoughtfully, offers freedom rather than restriction. It allows certain decisions to be made early so that later layers can remain loose, confident, and responsive.
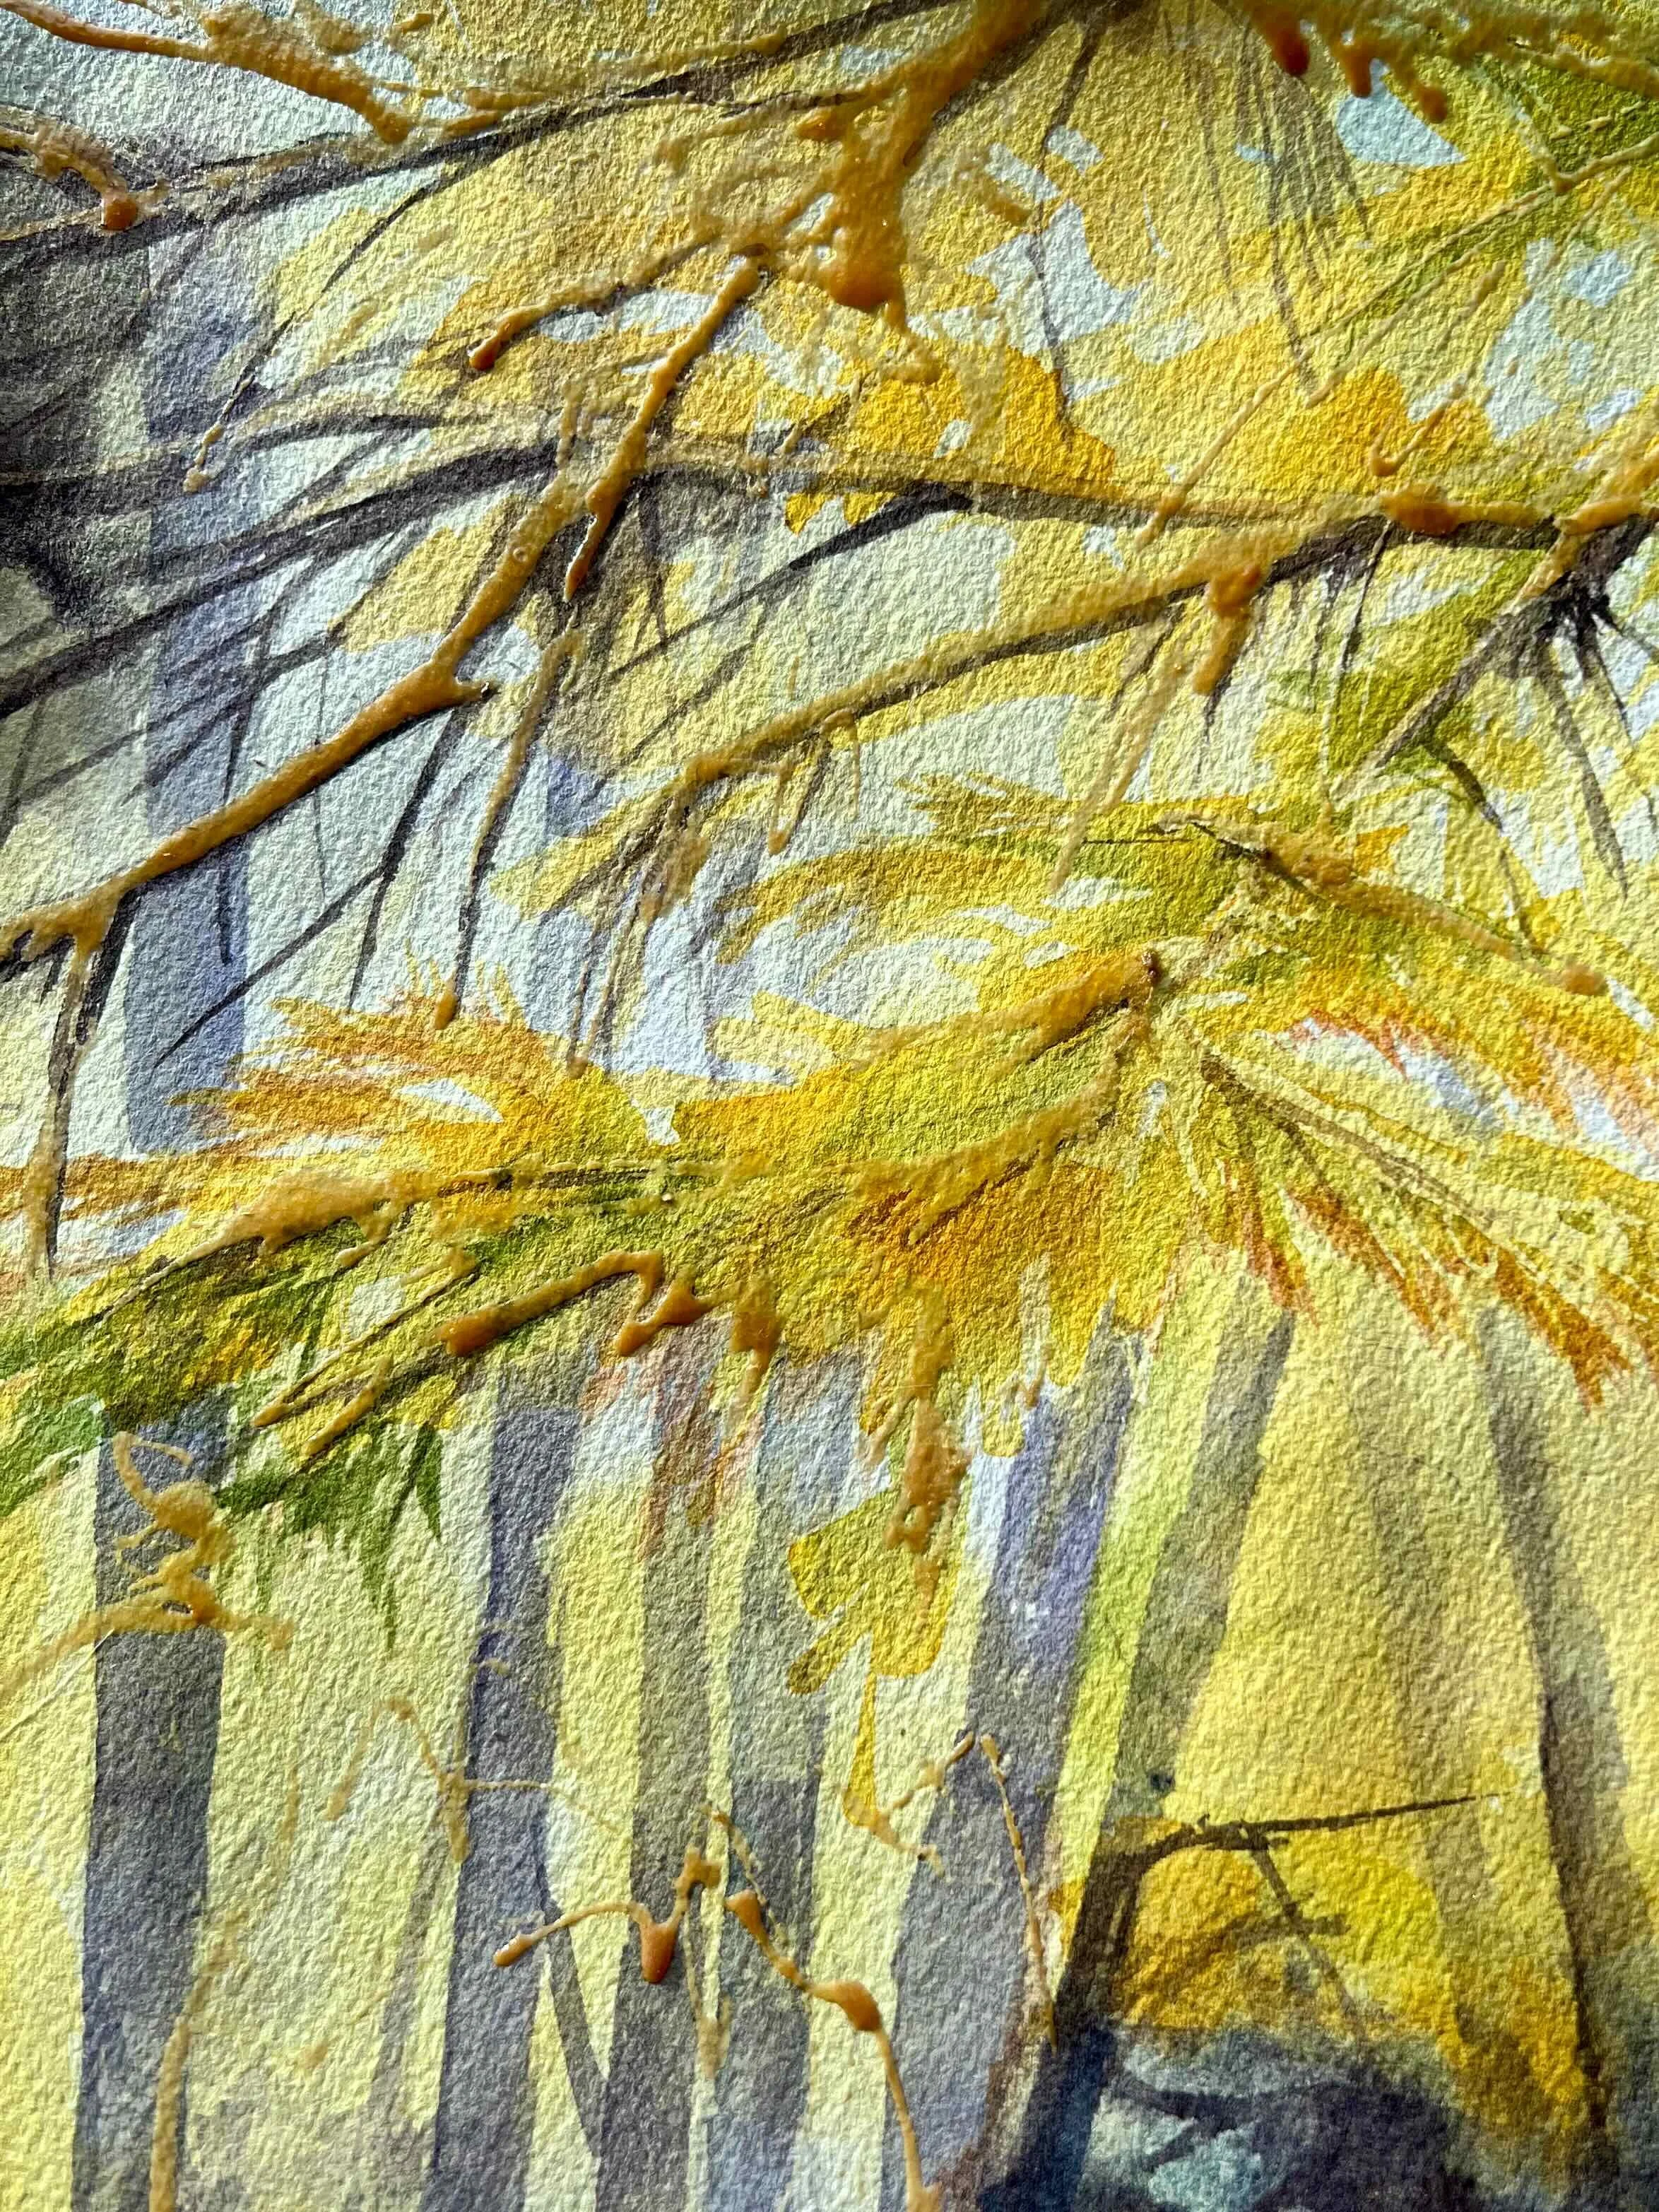
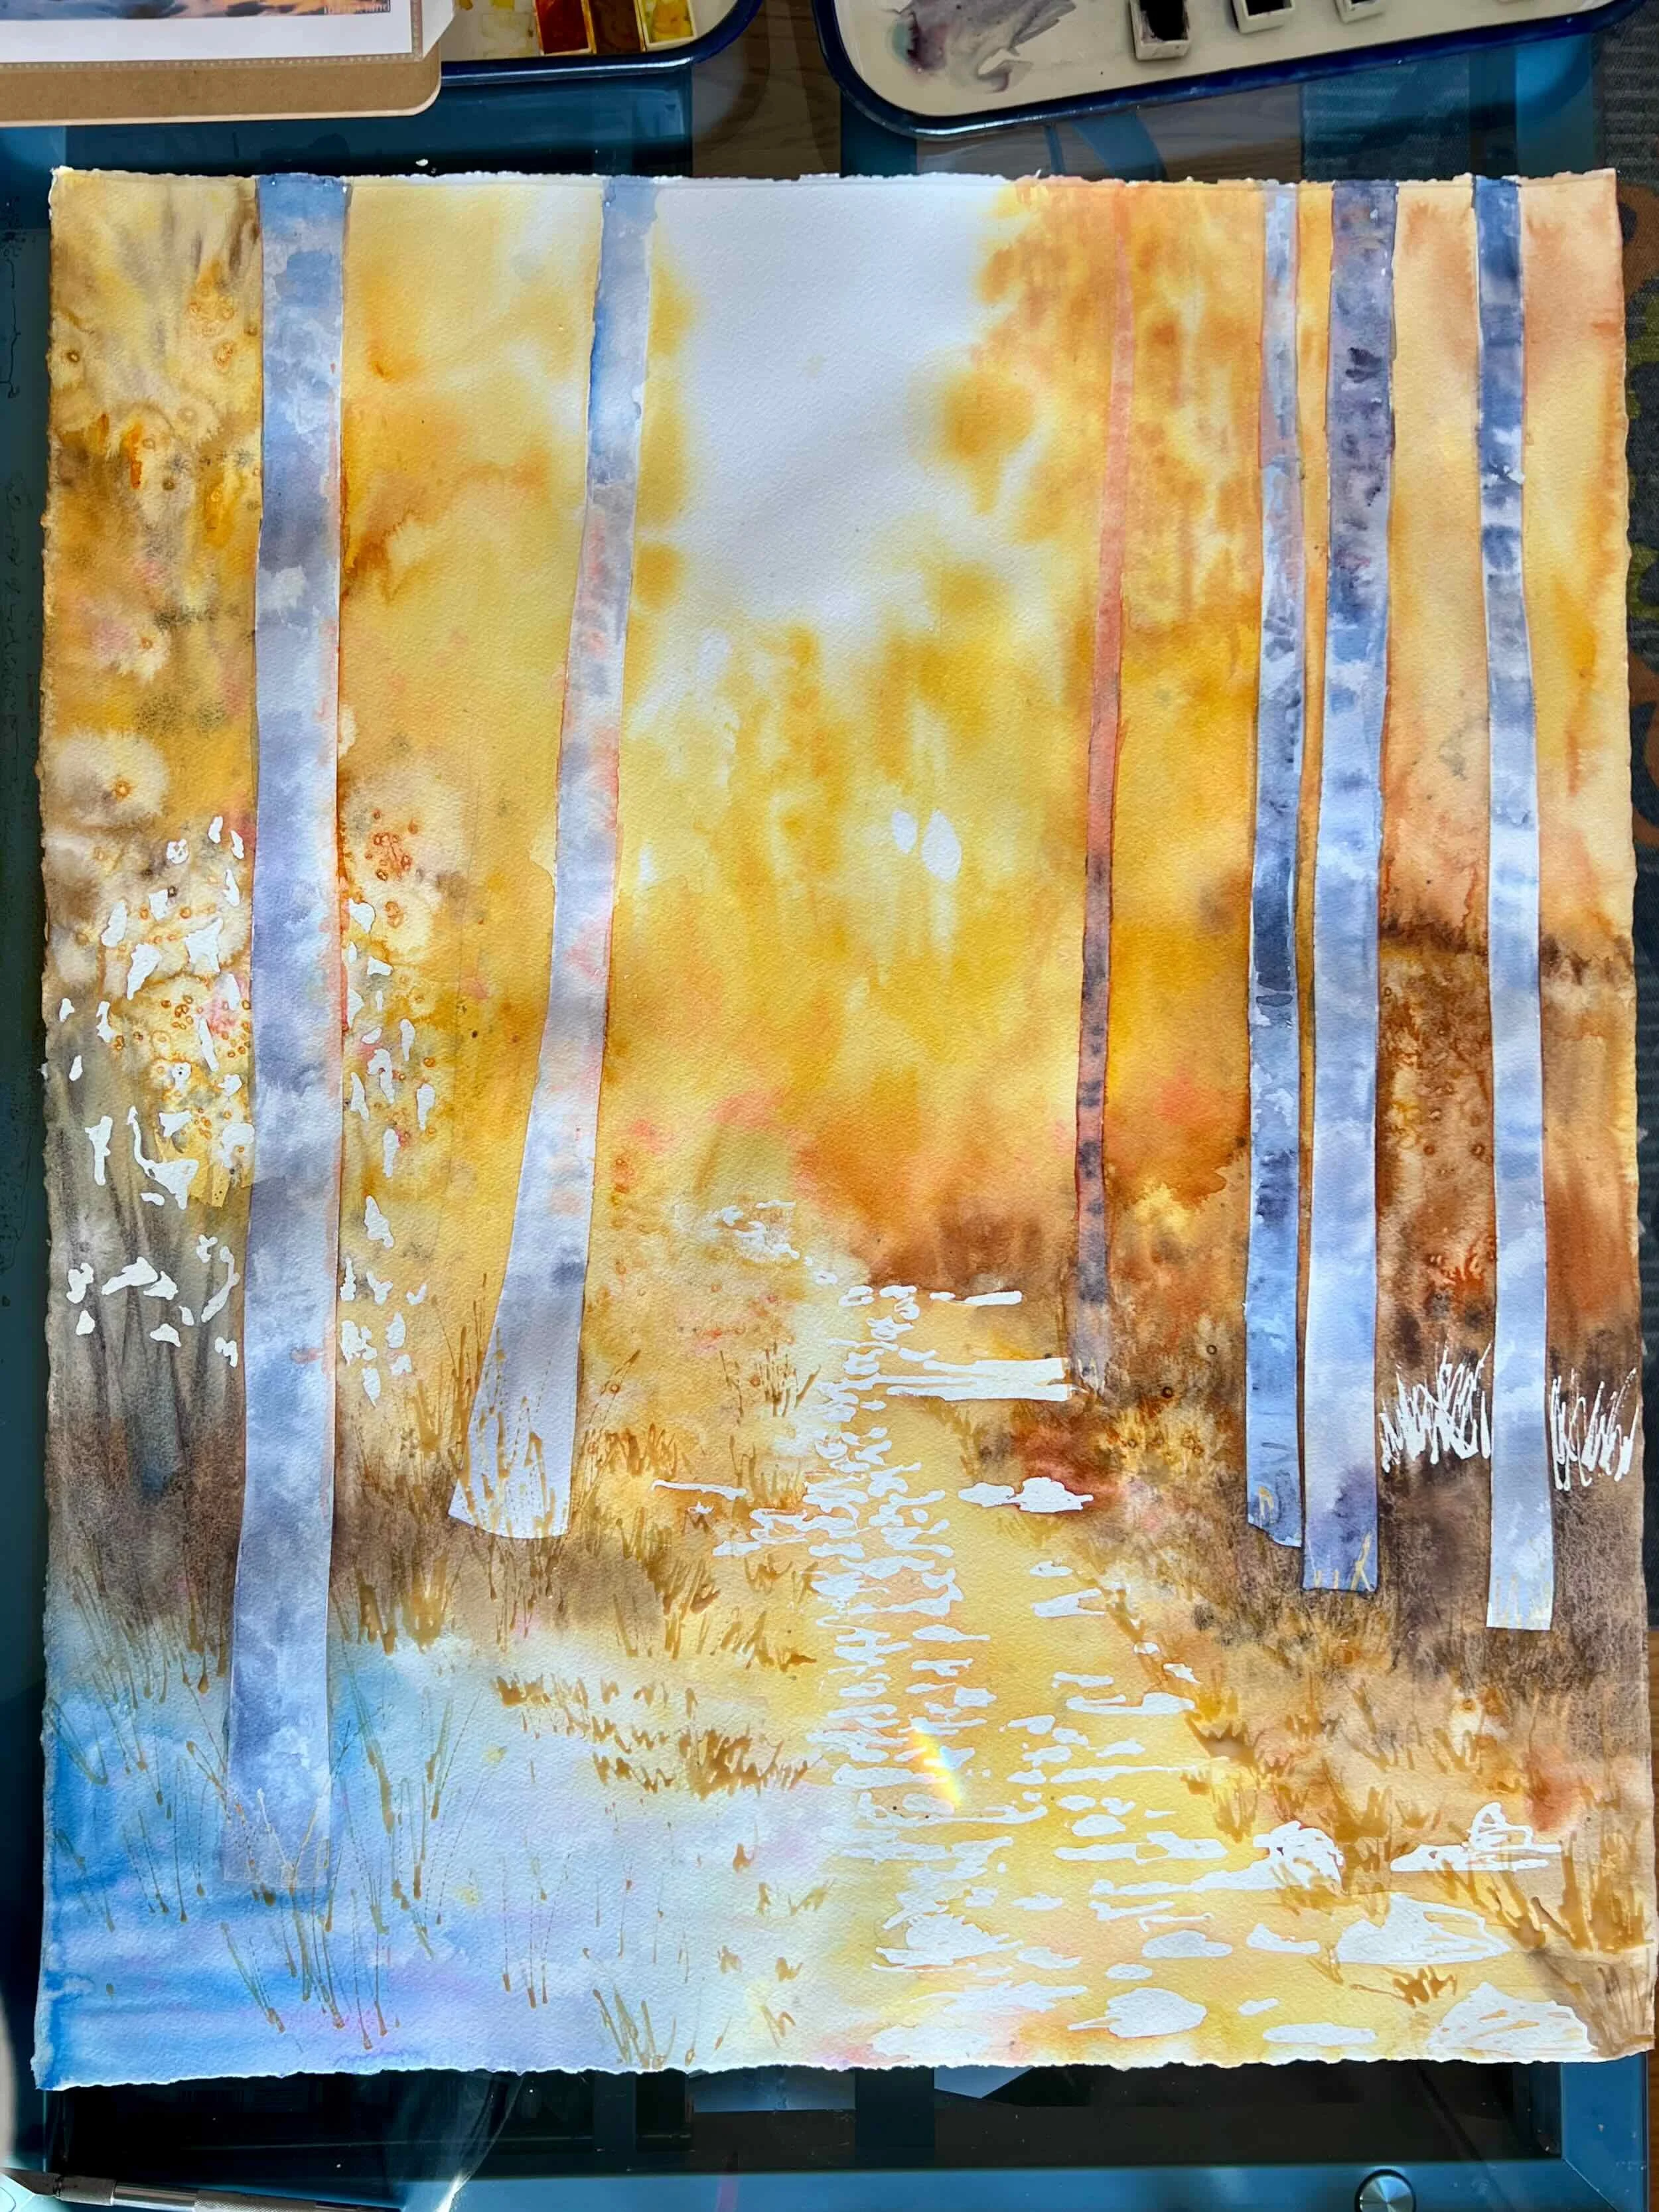
A section of a painting by Lindsay Godfrey, showing the highlights created by masking fluid.
If this is a tool you’re curious about, spend time experimenting with it in your own practice. Use it sparingly, notice how it changes your approach to planning, and observe how preserving the white of the paper influences the final painting. Exploration is often where the most meaningful understanding begins.